
Here's the easiest solution I found to serve your assets from a cookieless subdomain.
We will be using Amazon CloudFront, so if you don't already have an account, go create one.
In this tutorial I will assume that your files are stored locally. Meaning that you don't use any CDN. This is the most common case for small websites.
The idea is to serve your assets from a CloudFront subdomain https://static.example.com. This subdomain will fetch the content from your static folder https://www.example.com/static.
Create a folder for your assets
We want all of our static files to be in a single folder.
If your current structure is like this:
example.com/js
example.com/css
example.com/img
Then you'll need to create a new folder to have something like this
example.com/static/js
example.com/static/css
example.com/static/img
So all your files in the static subfolder will be served without cookies.
Update your webpack file
Put all your assets into a static folder.
In your webpack.mix.js file, just add the static subfolder to your configuration:
// For instance, this saas
.sass('resources/assets/sass/app.scss', 'public/css/scss.css')
// becomes this
.sass('resources/assets/sass/app.scss', 'public/static/css/scss.css')
// and so on...
Also copy your fonts like this:
.copyDirectory('./public/fonts', 'public/static/fonts')
Here's the Laravel Mix documentation if needed.
Update your links
Find all your <script> and <style> tags and update them.
You can create a small helper function to generate the links like this:
function getStatic($file)
{
    if (App::environment('local'))
        return asset("static/$file");

    return "https://static.example.com/$file";
}
So you can do this:
<link href="{{ getStatic('css/app.css') }}" rel="stylesheet">
I'm using file versioning so it's a bit more tricky since Laravel Mix appends the id number at the end of files, so here's what I came up with:
function getStaticV($file)
{
    if (App::environment('local'))
        return asset($file);

    return "https://static.example.com" . str_replace('/static', '', $file);
}
Then you can use:
<link href="{{ getStaticV(mix('static/css/app.css')) }}" rel="stylesheet">
Do this for .js, .css and your image links.
We're done with your website, you can commit your changes, but don't deploy yet.
Create an SSL certificat
You probably have an SSL certificate, if you don't, you probably should :)
So we will need to generate a certificate for static.example.com.
Go to Amazon Certificate Manager.
Click on "Request a certificat".
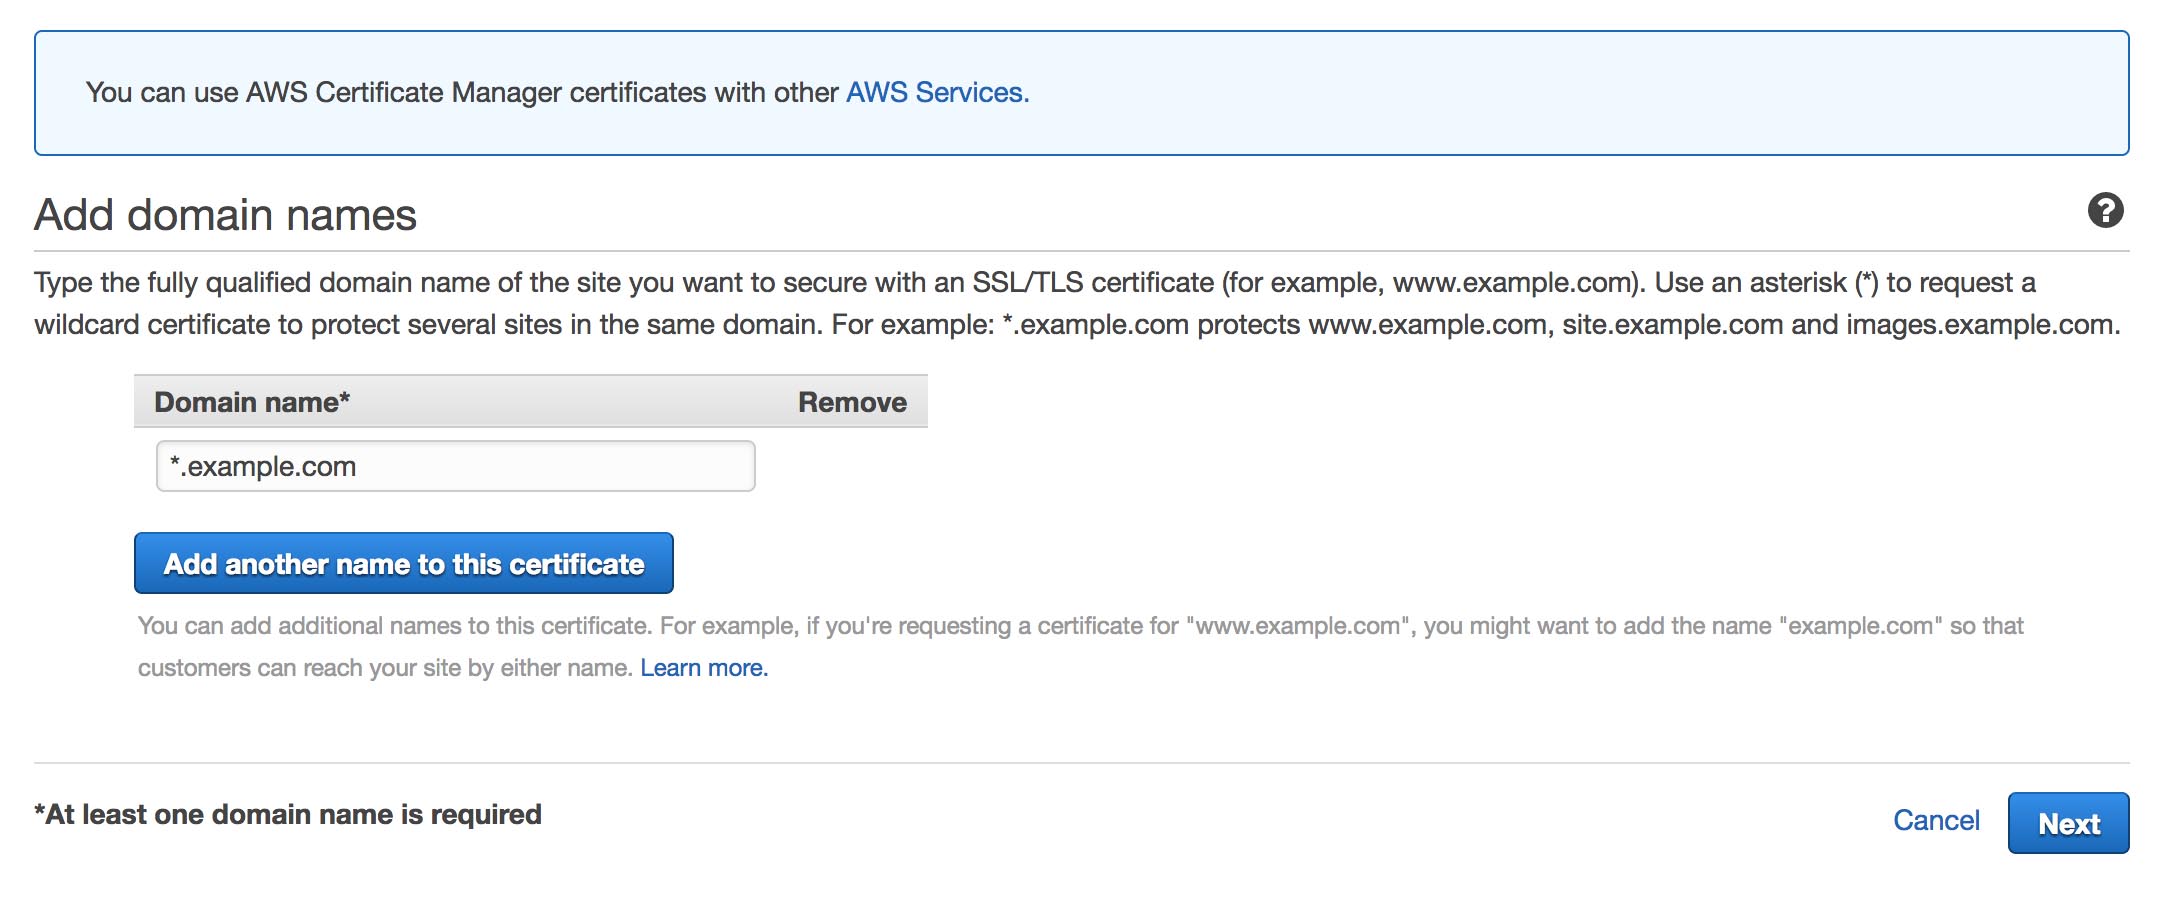
Add your subdomain. You can use a wildcard like I did or just use static.example.com.
Click on Next, then choose what method you want to use to validate the ownership.
I personally used the "DNS validation" and I've added a CNAME record to validate it, so I can disable that certificat by removing the CNAME record.
It usually takes a couple of minutes to propagate. Refresh the page after a few minutes and your certificat should be ready!
Configure Amazon CloudFront
Since we will serve the fonts from a different subdomain, you might face an issue like this in the future:
Font from origin 'blablabla' has been blocked from loading by Cross-Origin Resource Sharing policy: No 'Access-Control-Allow-Origin' header is present on the requested resource. Origin 'https://static.example.com' is therefore not allowed access.
To prevent that, you must send the header to CloudFront when they fetch the static files.
We're doing this now so CloudFront will have the right setting from the beginning.
Here's how to do it if you use Nginx:
location ~* \.(eot|ttf|woff|woff2)$ {
    add_header 'Access-Control-Allow-Origin' '*';
}
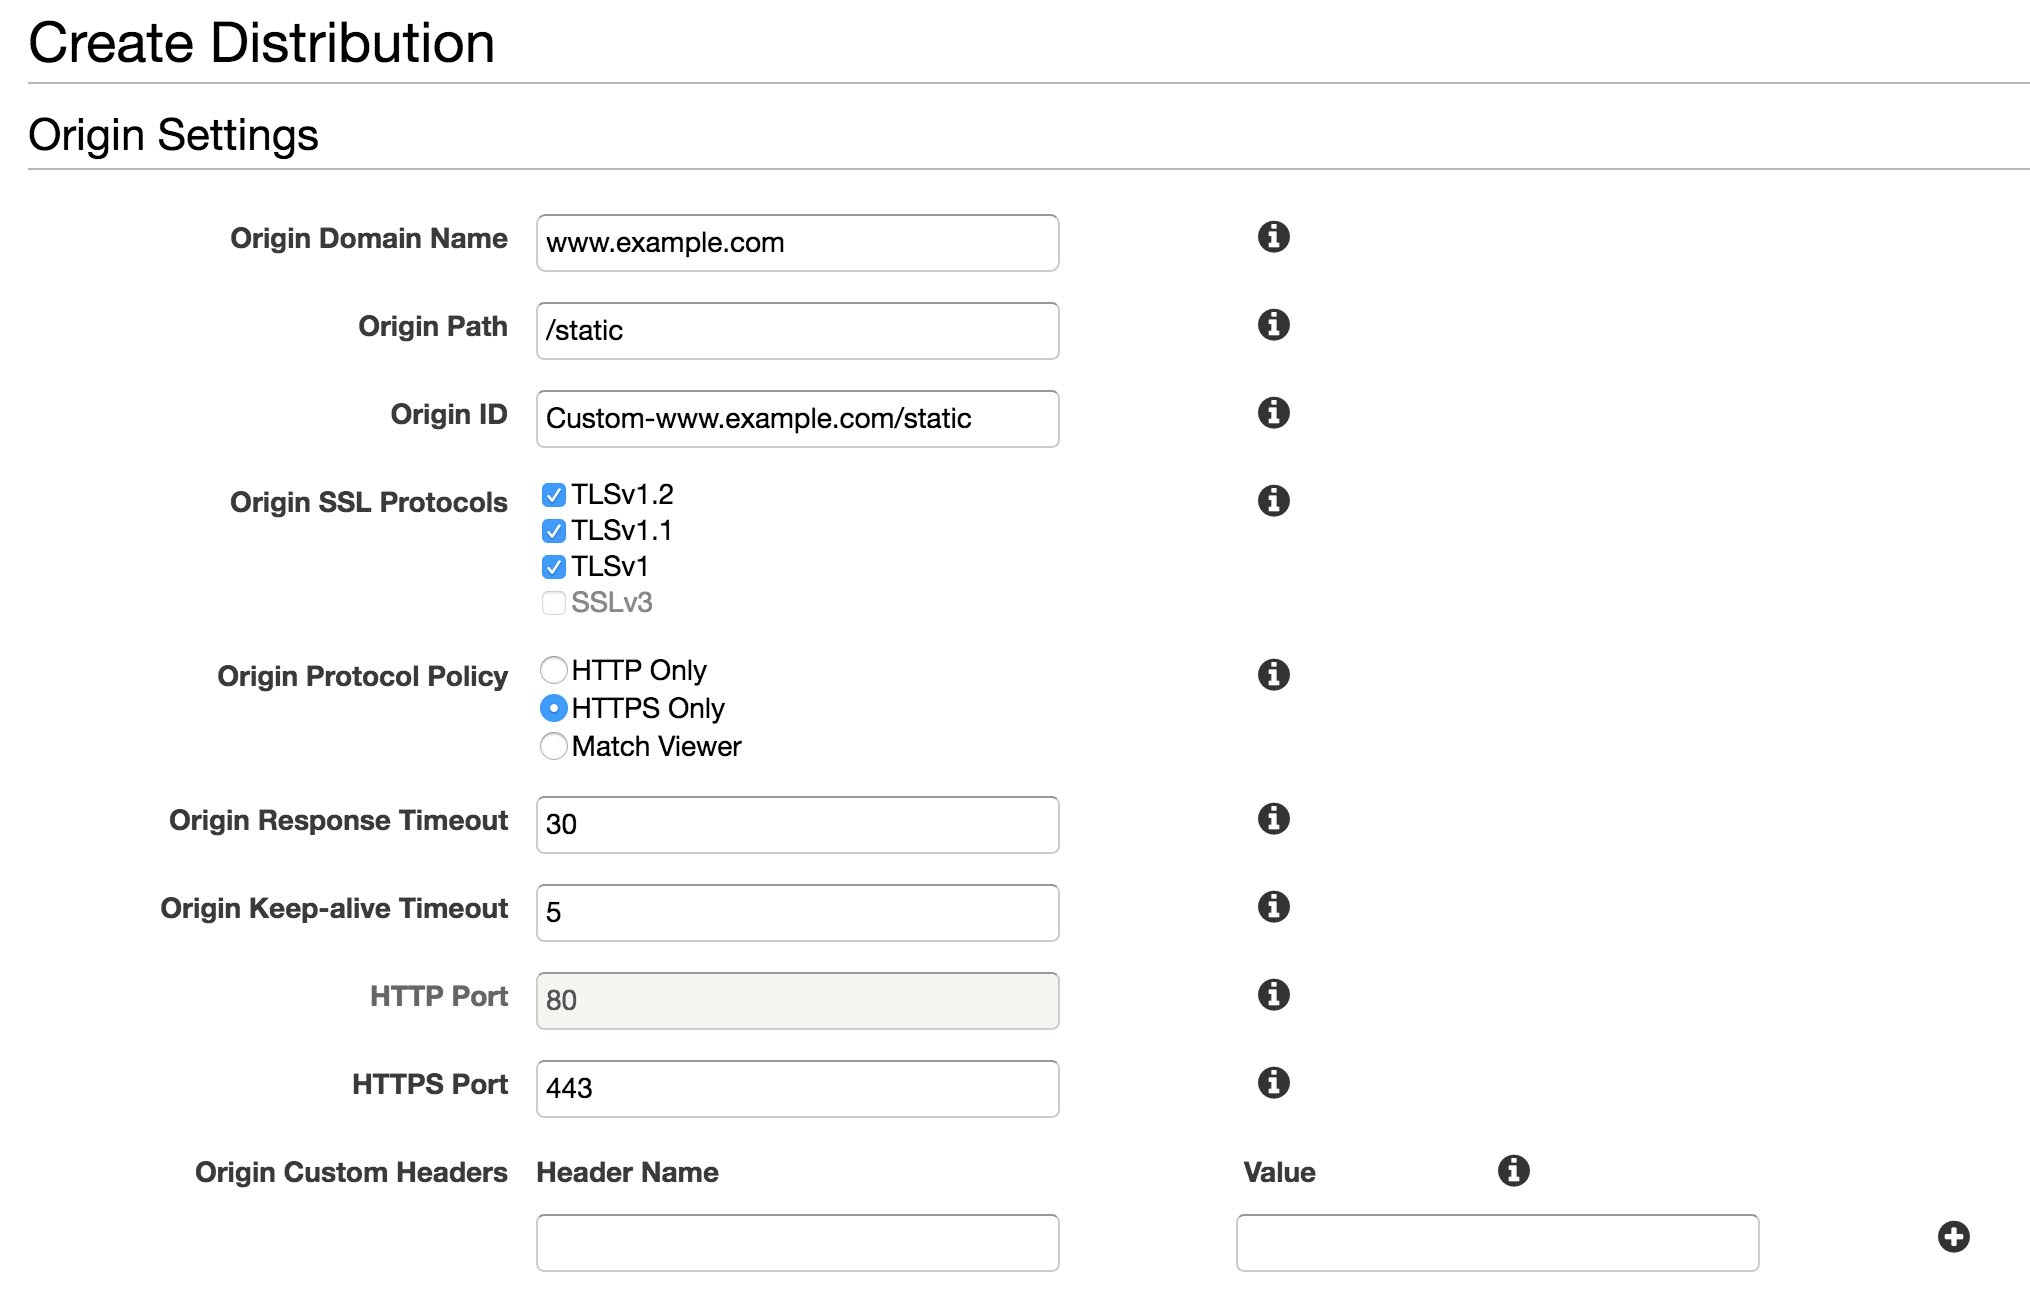
Then go to CloudFront.
Create a new distribution, choose a web distribution and follow the settings below:
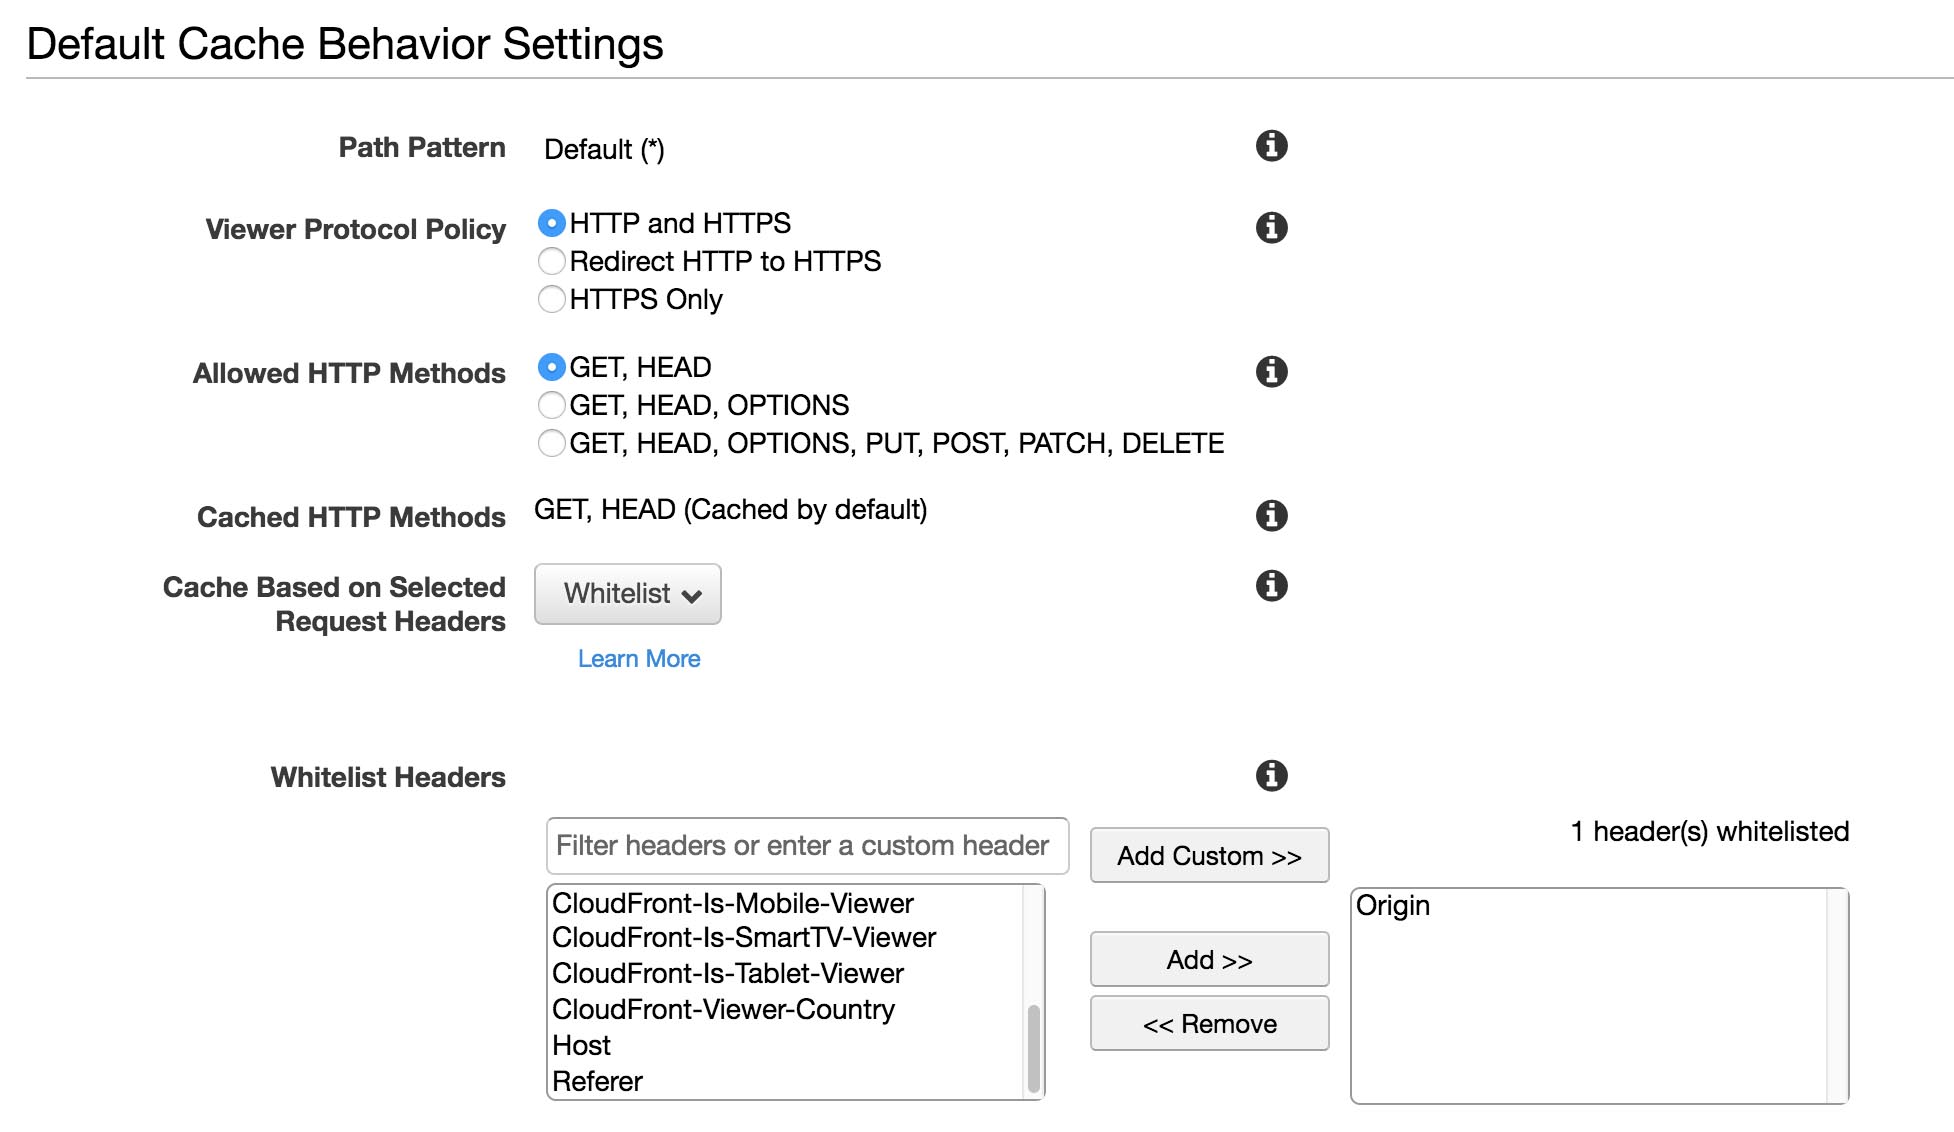
Then on the "Default Cache Behavior Settings", you'll have to whitelist the header "Origin", find it in the list and click on "Add >>".
This will forward the Origin header that we've configured earlier.
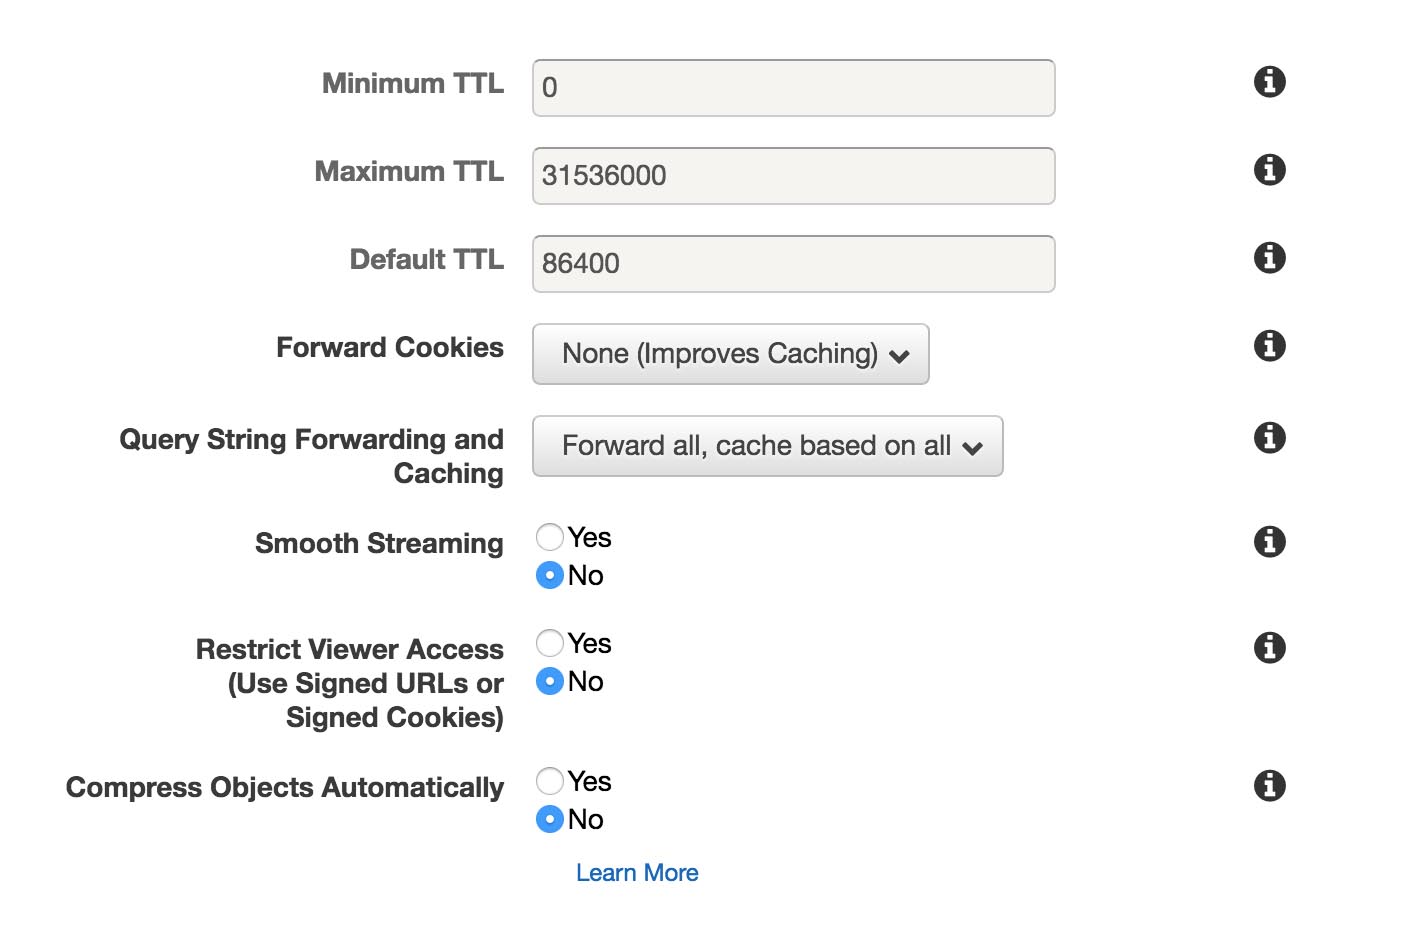
Also forward the query strings as below.
If you don't, CloudFront won't pay attention to your versionned files.
Set your subdomain as the alternate domain name and select your custom SSL certificate from the list.
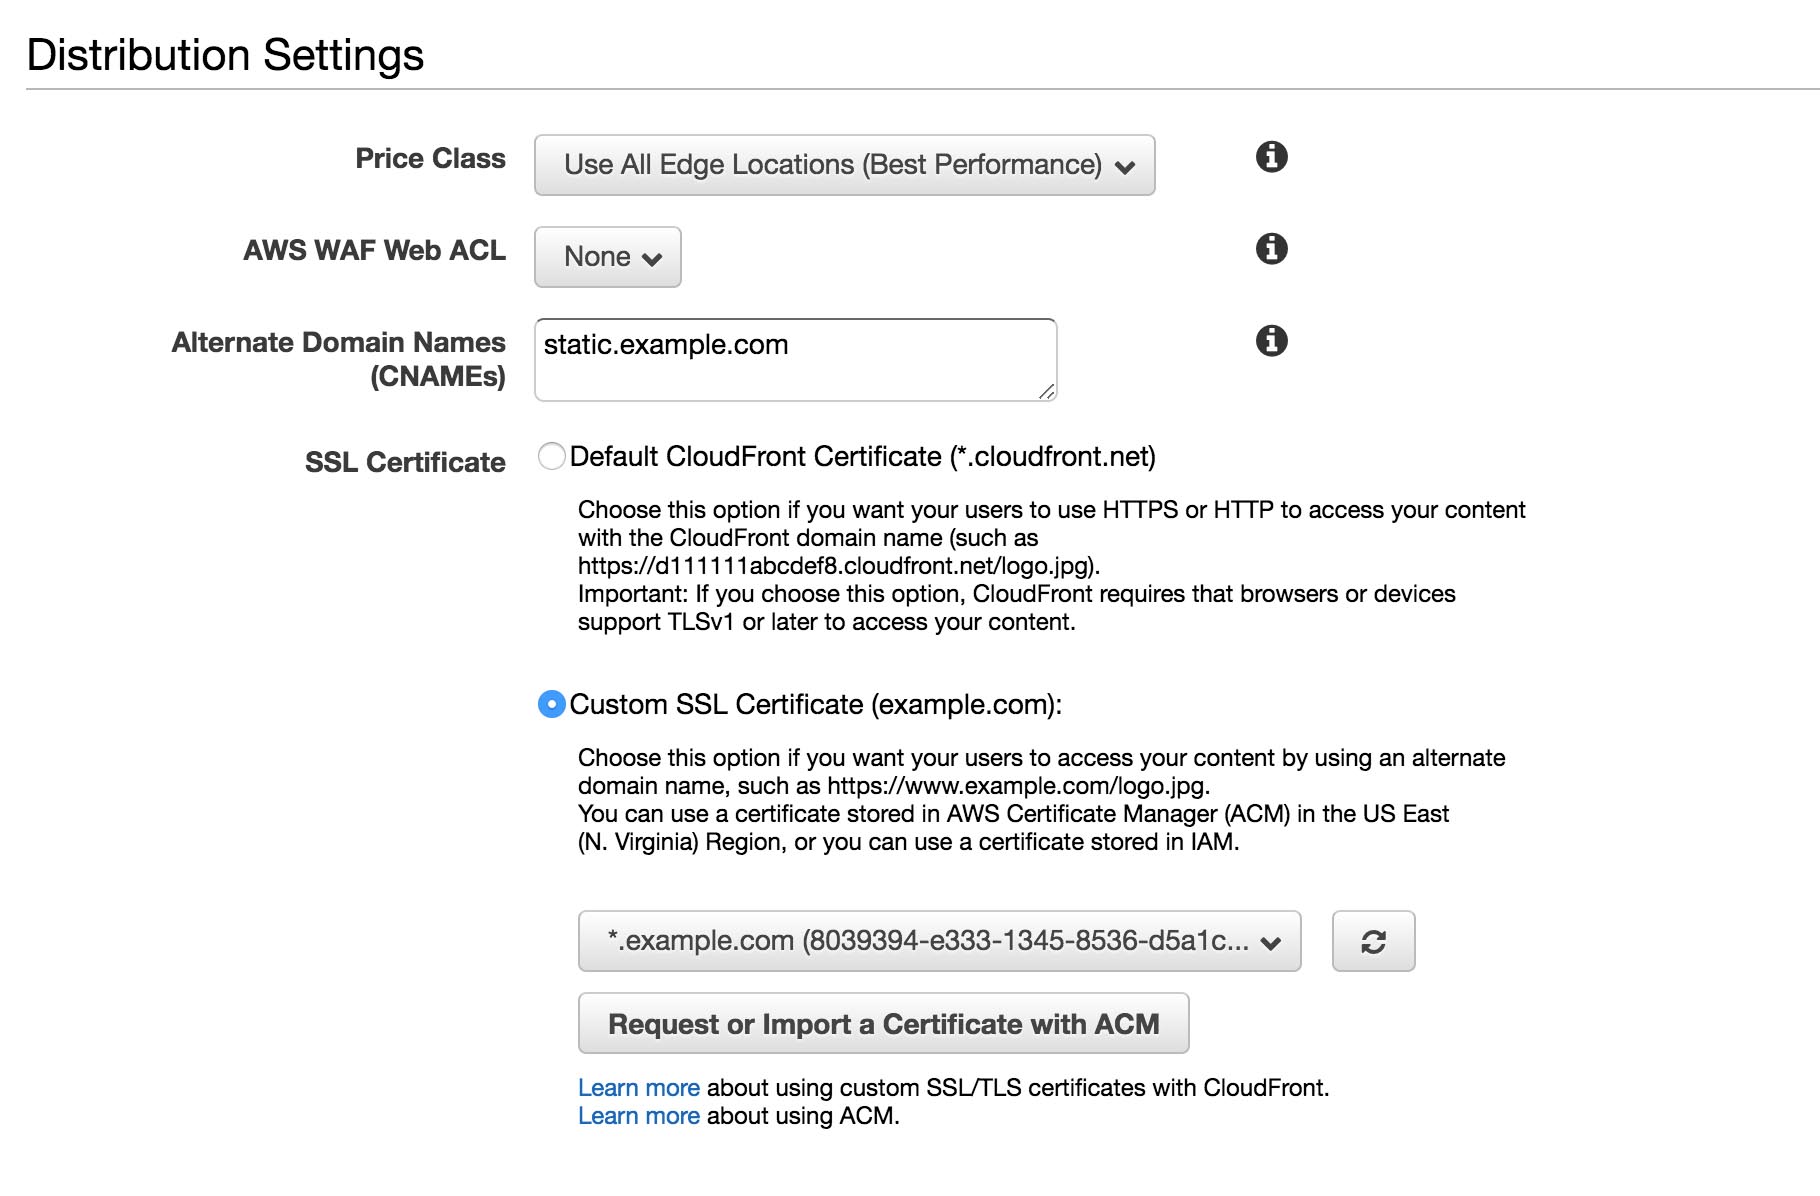
Leave everything else as default and create your distribution.
Create a CNAME record
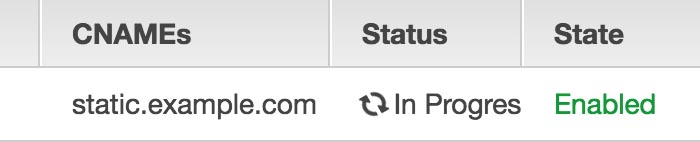
While we wait for the deployment of the distribution (it can takes up to 30min), we'll create the CNAME record.
You'll find the domain name of your CloudFront distribution on the index page. It looks like this:
abcdefghijklmnop.cloudfront.net
Copy that, and go to your registrar to add your CNAME record, from static.example.com to abcdefghijklmnop.cloudfront.net..
You're all set!
Now just wait for the distribution to be deployed and your CNAME to be propagated.
And when it's done, push your last commit to production.